


Índice
- Por que eu adoro essas bolinhas de massa com alho
- Dicas para uma massa macia e cobertura amanteigada de alho
- Variações fáceis
- Adicione queijo
- Adicione um pouco de calor.
- Solução de problemas com bolinhas de massa de alho
- O que servir com eles
- perguntas frequentes
- Posso reduzir a receita de Bolinhas de Massa de Alho pela metade?
- Posso congelar bolinhas de massa de alho?
- Por que eu assaria as bolinhas de massa antes de adicionar a manteiga de alho?
- Como sei quando as bolinhas de massa estão completamente assadas?
- Por que usar uma assadeira funda para assar o pão com manteiga de alho?
- Como devo armazenar as bolinhas de massa de alho que sobrarem?
- As bolinhas de massa de alho são a mesma coisa que os nós de alho?
- Ir para a receita
Por que eu adoro essas bolinhas de massa com alho
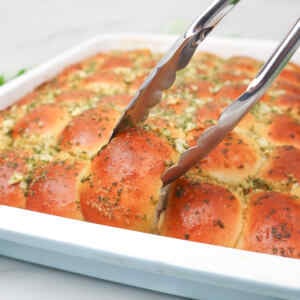
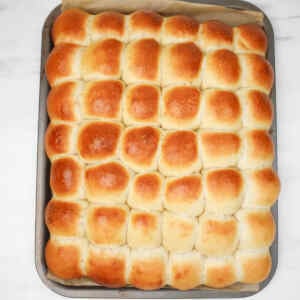
Essas bolinhas de massa com alho são o tipo de receita que eu faço quando quero um acompanhamento quentinho e amanteigado para um pequeno grupo de pessoas. A massa fica dourada por fora e macia por dentro, e depois é finalizada com uma rica cobertura de manteiga de alho que derrete sobre cada pedaço.

Por que eu adoro essas bolinhas de massa com alho
Esta receita rende uma quantidade generosa, mas, claro, pode ser reduzida pela metade se você precisar de menos. Eu gosto de fazer a receita completa porque essas bolinhas de massa são ótimas para preparar refeições com antecedência. Às vezes, faço até o dobro da receita, divido em porções e guardo para usar como acompanhamento nos próximos meses.
Elas congelam muito bem também. Basta congelar as bolinhas de massa assadas e resfriadas antes de espalhar a manteiga de alho. Quando quiser para o jantar, descongele-as, adicione a cobertura de manteiga e asse até ficarem quentes e com um aroma delicioso de alho.
O processo de cozimento em duas etapas é o que confere a essas bolinhas de massa sua textura macia e o rico sabor de alho. Primeiro, asse-as em uma assadeira até que estejam douradas e completamente cozidas. Assim que esfriarem o suficiente para manusear, transfira-as para uma assadeira funda, espalhe a manteiga de alho por cima e retorne ao forno. As laterais altas da assadeira mantêm a manteiga derretida ao redor do pão, evitando que escorra para o fundo do forno.
Eu sempre sirvo essa receita com minhas pizzas caseiras e com o tradicional espaguete à bolonhesa. Elas são macias, saborosas, fáceis de compartilhar e perfeitas para aproveitar o molho ou para dar um toque especial a uma refeição em família.

Dicas para uma massa macia e cobertura amanteigada de alho
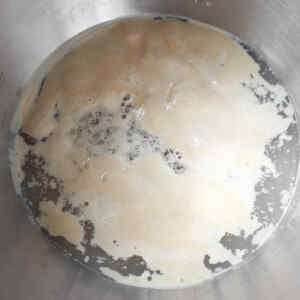
A primeira coisa a observar é a mistura de fermento. Depois de a água morna, o fermento biológico seco e o açúcar entrarem em contato, a mistura deve cheirar a fermento e parecer ativa. Este é um bom sinal de que a massa está pronta para continuar.
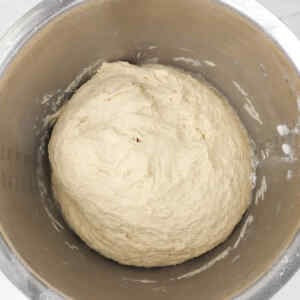
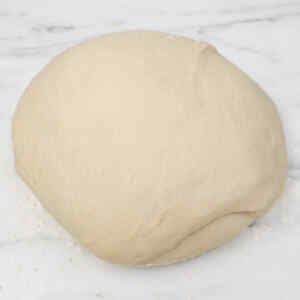
Adicione a farinha de trigo aos poucos enquanto o gancho da batedeira estiver em velocidade baixa. A massa deve se soltar das laterais da tigela, mas não deve estar seca. Ao pegar um pedacinho e enrolá-lo em uma bolinha, ela deve estar macia e com apenas um leve resíduo pegajoso nos dedos.
Se a massa estiver muito pegajosa, adicione mais farinha aos poucos. Algumas colheres de sopa de cada vez são suficientes. Farinha em excesso pode deixar as bolinhas de massa menos macias.

Deixe as bolinhas de massa moldadas crescerem até ficarem com uma aparência fofa. Essa indicação visual é importante porque ajuda a criar uma textura mais leve depois de assadas. Use uma balança de cozinha se quiser pedaços de tamanho mais uniforme.
A assadeira funda é importante para a cobertura. Ela mantém a manteiga de alho derretida ao redor das bolinhas de massa, evitando que escorra. Deixe as bolinhas de massa assadas esfriarem antes de adicionar a cobertura para que seja mais fácil transferi-las e cobri-las.

Variações fáceis
Adicione queijo
Para bolinhas de massa com alho e queijo, coloque um pequeno cubo de mussarela no centro de cada bolinha antes de assar. Você também pode polvilhar parmesão ralado sobre a cobertura de manteiga de alho antes da última assada para um toque salgado e saboroso.
Adicione um pouco de calor.
Antes de espalhar a cobertura de manteiga com alho sobre as bolinhas de massa, misture uma pitada de flocos de pimenta vermelha. Isso adiciona um toque picante suave que combina perfeitamente com o alho, a salsa e o sal marinho.

Solução de problemas com bolinhas de massa de alho
Se a massa estiver muito pegajosa, adicione farinha aos poucos, algumas colheres de sopa de cada vez, até que fique macia e ligeiramente grudenta. Se as bolinhas de massa assarem de forma desigual, use uma balança de cozinha para que fiquem com tamanhos semelhantes. Se não estiverem crescendo bem, verifique se o fermento está ativo antes de preparar a massa. Se a manteiga de alho começar a vazar, use uma assadeira funda. Asse as bolinhas de massa até dourarem e atingirem uma temperatura interna de 88–90 °C.

O que servir com eles
Sirva essas bolinhas de massa com alho ainda mornas, enquanto a manteiga de alho derrete e exala aroma. Elas são perfeitas para acompanhar pizzas caseiras, espaguete à bolonhesa tradicional ou qualquer prato de massa que peça um acompanhamento macio e amanteigado para absorver o molho.
Elas também são ótimas como aperitivo antes da refeição principal. Coloque-as no centro da mesa enquanto ainda estiverem quentes e deixe que cada um as sirva à vontade. Ficam especialmente saborosas acompanhadas de uma taça de vinho branco bem gelado.
Bolinhas de massa de alho
Equipamento
- Batedeira (com gancho para massa)
- Balança de cozinha (opcional)
- Pano de cozinha limpo ou filme plástico
- assadeira altaou assadeira
Ingredientes
Para as bolinhas de massa
- 2 xícaras água morna cerca de 100°F
- 2 colheres de sopa fermento instantâneo
- ¼ xícara açúcar granulado
- 1 colher de sopa sal
- 1 grande ovo levemente batido
- ¼ xícara azeite
- 7 ¾ xícaras farinha de pão
- 1 ovo grande para pincelar com ovo
- 1 respingo água para pincelar com ovo
Para a cobertura de manteiga de alho
- ½ xícara manteiga sem sal
- 3 dentes de alho picado
- 1 colher de chá salsa seca
- 1 colher de chá alho em pó
- ½ colher de chá sal marinho
- 1 colher de sopa azeite
Instruções
- Adicione a água morna, o fermento instantâneo e o açúcar à tigela de uma batedeira.2 xícaras de água morna, 2 colheres de sopa de fermento biológico instantâneo, ¼ de xícara de açúcar granulado

- Deixe a mistura repousar por alguns minutos, até que fique com um leve cheiro de fermento e pareça ativa.
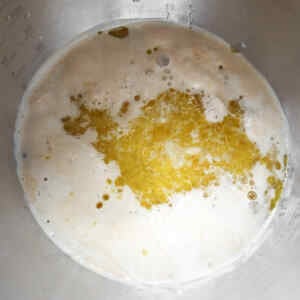
- Adicione o ovo levemente batido, o azeite e o sal à tigela.1 colher de sopa de sal, 1 ovo grande, ¼ de xícara de azeite
- Com o gancho de massa em velocidade baixa, adicione a farinha de trigo, uma xícara de cada vez.7 ¾ xícaras de farinha de pão
- Continue misturando até que a massa se solte das laterais da tigela.
- Pegue um pequeno pedaço de massa e enrole-o formando uma bola. Ela deve estar macia ao toque, com apenas um leve resíduo pegajoso nos dedos. Se a massa estiver muito pegajosa, adicione um pouco mais de farinha, algumas colheres de sopa de cada vez.
- Amasse a massa por cerca de 8 minutos, até ficar lisa, macia e ligeiramente pegajosa.
- Deixe a massa descansar por 5 minutos para relaxar.
- Polvilhe levemente a superfície de trabalho com farinha e coloque a massa sobre ela.
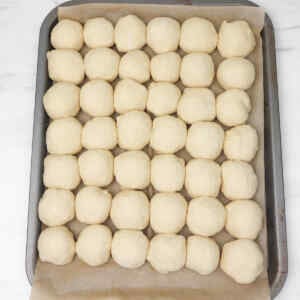
- Divida a massa em cerca de 42 porções iguais, dependendo do tamanho desejado. Para bolinhas de massa mais uniformes, use uma balança de cozinha.
- Dê forma a cada pedaço, transformando-o numa bola lisa, puxando as bordas em direção ao centro.
- Coloque as bolinhas de massa em uma assadeira forrada com papel manteiga.
- Cubra com um pano de prato limpo ou filme plástico.
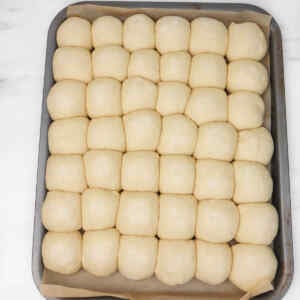
- Deixe as bolinhas de massa crescerem em um local aquecido por cerca de 30 minutos, ou até ficarem fofas.
- Pré-aqueça o forno a 200°C. Se o seu forno esquentar demais, reduza a temperatura para 190°C.
- Numa tigela pequena, bata o ovo com um pouco de água para fazer a mistura de ovo.1 ovo grande, 1 respingo de água
- Pincele levemente a parte superior das bolinhas de massa com a gema de ovo batida.
- Asse por cerca de 20 minutos, ou até dourar.
- A temperatura interna deve atingir 190-195°F quando estiver completamente assado.
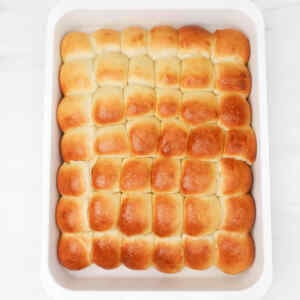
- Transfira as bolinhas de massa para uma grelha e deixe-as esfriar antes de adicionar a cobertura.
- Pré-aqueça o forno novamente a 200°C (400°F).
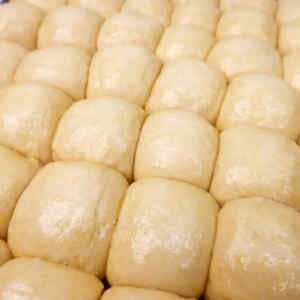
- Transfira as bolinhas de massa assadas para uma assadeira funda ou refratário. Isso ajuda a evitar que a manteiga de alho escorra durante o cozimento.
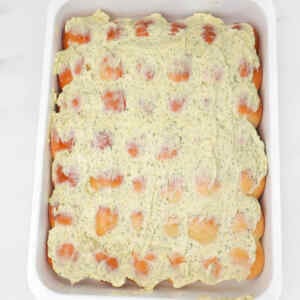
- Numa tigela pequena, misture a manteiga sem sal, o alho picado, a salsa seca, o alho em pó, o sal marinho e o azeite até obter uma mistura homogênea.½ xícara de manteiga sem sal, 3 dentes de alho, 1 colher de chá de salsa seca, 1 colher de chá de alho em pó, ½ colher de chá de sal marinho, 1 colher de sopa de azeite
- Espalhe a mistura de manteiga com alho sobre as bolinhas de massa assadas.
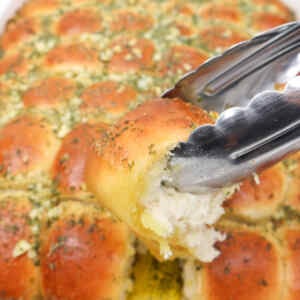
- Asse por 10 minutos, até que a manteiga de alho derreta sobre as bolinhas de massa.
- Sirva quente.
Notas
- Verifique o fermento antes de preparar a massa. Ele deve ter cheiro de fermento e parecer ativo após ficar em contato com a água morna e o açúcar.
- A massa deve ficar macia e ligeiramente pegajosa, não seca. Se necessário, adicione farinha extra apenas algumas colheres de sopa de cada vez.
- Use uma balança de cozinha se quiser bolinhas de massa de tamanho uniforme. Isso ajuda a assá-las no mesmo tempo.
- Deixe as bolinhas de massa crescerem até ficarem fofinhas antes de assar. Isso lhes dará uma textura mais macia.
- Use uma assadeira funda para o assado de manteiga com alho. Isso ajuda a manter a manteiga derretida dentro da assadeira, evitando que ela transborde.
- Deixe as bolinhas de massa esfriarem antes de adicionar a cobertura para que seja mais fácil transferi-las e cobri-las.
- Sirva as bolinhas de massa com alho ainda mornas para obter a melhor textura e sabor.
Nutrição
perguntas frequentes
Posso reduzir a receita de Bolinhas de Massa de Alho pela metade?
Sim. A receita completa rende cerca de 42 bolinhas de massa, mas você pode reduzir todos os ingredientes pela metade para fazer uma porção menor. Tente manter os pedaços de massa com tamanhos semelhantes para que assem por igual.
Posso congelar bolinhas de massa de alho?
Sim. Asse as bolinhas de massa e deixe-as esfriar completamente. Em seguida, congele-as antes de adicionar a manteiga de alho. Descongele-as na geladeira, adicione a cobertura e asse até ficarem quentes e douradas.
Por que eu assaria as bolinhas de massa antes de adicionar a manteiga de alho?
Assar as bolinhas de massa primeiro ajuda a cozinhá-las por completo e a dourá-las antes de adicionar a cobertura de manteiga. A segunda assada derrete a manteiga de alho sobre as bolinhas de massa prontas, sem deixar a massa muito úmida.
Como sei quando as bolinhas de massa estão completamente assadas?
As bolinhas de massa devem estar douradas por fora. Para uma verificação mais precisa, a temperatura interna deve atingir 88-90°C (190-195°F).
Por que usar uma assadeira funda para assar o pão com manteiga de alho?
Uma assadeira ou refratário com laterais altas ajuda a manter a manteiga de alho derretida ao redor das bolinhas de massa. Isso impede que a manteiga escorra da assadeira durante o cozimento.
Como devo armazenar as bolinhas de massa de alho que sobrarem?
Deixe as bolinhas de massa esfriarem, transfira-as para um recipiente hermético e leve-as imediatamente à geladeira. Consuma as sobras refrigeradas em até três ou quatro dias e reaqueça apenas a quantidade que pretende servir.
As bolinhas de massa de alho são a mesma coisa que os nós de alho?
Eles usam muitos dos mesmos ingredientes, mas as bolinhas de massa de alho são moldadas em formato de pãozinho redondo em vez de serem amarradas em nós. Esta receita também inclui uma segunda fornada para derreter a manteiga de alho sobre o pão pronto.


