


Table of Contents
- The Irresistible Simplicity of Biscoff Truffles
- What Makes Biscoff Truffles So Special?
- Are You Using the Right Ingredients?
- How Fine Should the Biscuit Crumbs Be?
- How Do You Get the Perfect Truffle Mixture?
- What's the Best Way to Shape Biscoff Truffles?
- Why Is Chilling So Important?
- How Do You Melt Chocolate Without Ruining It?
- What's the Easiest Way to Coat the Truffles?
- Can You Customise Biscoff Truffles?
- How Should You Store Biscoff Truffles?
- When Are Biscoff Truffles Best Served?
- Jump to Recipe
The Irresistible Simplicity of Biscoff Truffles
There are desserts that demand precision, time, and patience, and then there are those rare recipes that deliver indulgence with almost effortless ease. Biscoff truffles belong firmly in the latter category.
The first time I made Biscoff truffles, it was less out of ambition and more out of curiosity. Could something so simple, just a handful of ingredients, no oven required, really produce a dessert worthy of sharing? The answer, as it turns out, was a resounding yes.
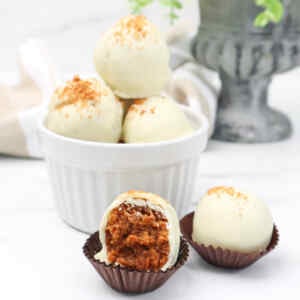
These truffles are rich, creamy, and deeply satisfying, with that unmistakable caramelised biscuit flavour that makes Biscoff so beloved. They are the kind of treat that feels luxurious, yet approachable, and is also perfect for gifting, entertaining, or simply keeping in the fridge for when you need something sweet.

What Makes Biscoff Truffles So Special?
What sets Biscoff truffles apart from other no-bake desserts?
It begins with the flavour. Biscoff biscuits have a warm, spiced, caramel profile that is instantly recognisable. When combined with cream cheese and Biscoff spread, that flavour becomes even more pronounced, smooth, balanced, and just sweet enough.
Then there's the texture. These truffles strike a perfect contrast: a soft, creamy centre encased in a crisp chocolate shell. It's a combination that feels both comforting and refined.
And perhaps most importantly, they are incredibly easy to make. No baking, no complicated techniques, just a few simple steps that come together beautifully.
Are You Using the Right Ingredients?
With a recipe this simple, every ingredient matters.
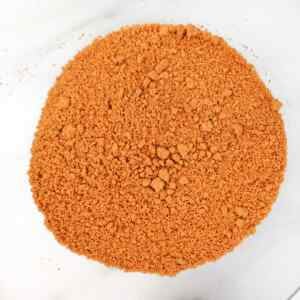
The foundation of Biscoff truffles is, of course, Biscoff biscuits. They provide both structure and flavour, so using a good-quality biscuit is essential. Crushing them into fine crumbs ensures a smooth, cohesive texture.
Cream cheese adds richness and helps bind the mixture together. It also balances the sweetness, preventing the truffles from becoming overly sugary.
Biscoff spread deepens the flavour, creating that signature creamy consistency. And finally, white chocolate provides the outer shell, sweet, smooth, and visually appealing.
So before you begin, consider this: are you choosing ingredients that will elevate the final result?

How Fine Should the Biscuit Crumbs Be?
Texture is everything when it comes to Biscoff truffles, and it starts with how you crush the biscuits.
I always aim for very fine crumbs, almost sand-like in consistency. A food processor makes this quick and easy, but a rolling pin works just as well if you take your time.
Larger chunks can create a slightly uneven texture, which isn't necessarily a problem, but for that classic truffle feel, finer is better.
So ask yourself: are your crumbs fine enough to create a smooth, melt-in-the-mouth centre?

How Do You Get the Perfect Truffle Mixture?
Once the biscuits are crushed, the next step is bringing everything together.
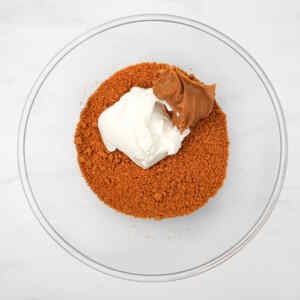
Mixing the crumbs with cream cheese and Biscoff spread should result in a thick, smooth mixture that holds its shape when rolled. If it feels too soft, chilling it briefly can make it easier to handle.
The key here is consistency. You want a mixture that is firm enough to roll, but still soft enough to feel creamy once set.
It's a simple step, but one that defines the final texture.
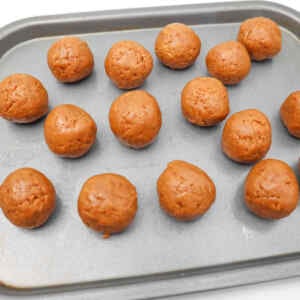
What's the Best Way to Shape Biscoff Truffles?
Shaping Biscoff truffles is where the recipe begins to take form, literally.
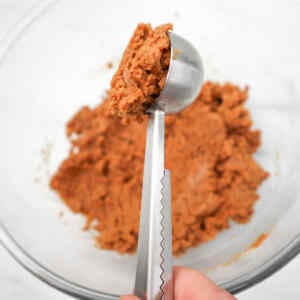
I like to use a small cookie scoop to ensure uniform size, then roll each portion gently between my hands. This not only makes the truffles look more professional, but also ensures they chill and set evenly.
Placing them on a lined tray keeps everything neat and prevents sticking.
It's a small detail, but one that makes a noticeable difference.

Why Is Chilling So Important?
Chilling is not just a step, it's essential.
Before coating, Biscoff truffles need to be firm. This helps them hold their shape when dipped in melted chocolate, preventing them from falling apart or becoming misshapen.
I recommend at least 30 minutes in the freezer, though an hour is even better if you have the time.
This step also makes the coating process smoother and more efficient.

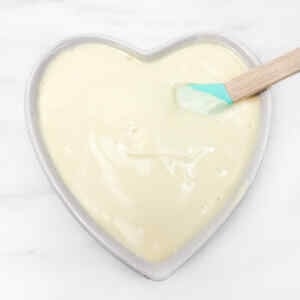
How Do You Melt Chocolate Without Ruining It?
Melting chocolate can seem straightforward, but it's one of the few places where things can go wrong.
For Biscoff truffles, I prefer melting white chocolate in short bursts in the microwave, stirring between each interval. This prevents overheating, which can cause the chocolate to become thick or grainy.
Alternatively, a bowl set over simmering water works just as well, offering gentle, even heat.
Patience is key here. Rushing can compromise the texture and finish.
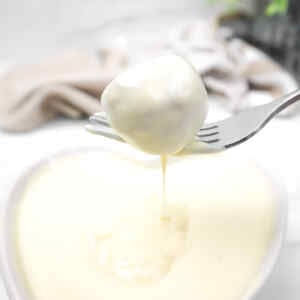
What's the Easiest Way to Coat the Truffles?
Coating Biscoff truffles in chocolate is perhaps the most satisfying step.
Using a fork or dipping tool, lower each chilled truffle into the melted chocolate, ensuring it is fully coated. Lift it out, allowing any excess to drip off before placing it back onto the tray.
Working quickly helps maintain a smooth finish, especially if the truffles begin to soften.
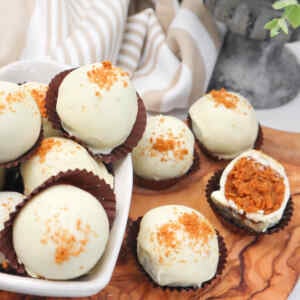
For a decorative touch, a sprinkle of biscuit crumbs on top adds both texture and visual appeal.
So consider: are you aiming for a clean, even coating?

Can You Customise Biscoff Truffles?
One of the joys of Biscoff truffles is their versatility.
While white chocolate offers a sweet contrast, milk or dark chocolate can create a richer, more balanced flavour. You might even drizzle a second type of chocolate over the top for a more decorative finish.
The filling itself can also be adjusted, slightly more Biscoff spread for extra creaminess, or a touch less for a firmer bite.
This is a recipe that invites experimentation without losing its essence.
How Should You Store Biscoff Truffles?
Storage is simple, but important.
Once set, Biscoff truffles should be kept in an airtight container in the fridge. They will stay fresh for up to five days, maintaining both their texture and flavour.
They also freeze beautifully, making them an excellent make-ahead dessert. Simply thaw in the fridge before serving.
This flexibility makes them ideal for busy schedules and special occasions alike.

When Are Biscoff Truffles Best Served?
There's rarely a wrong time for Biscoff truffles.
They work just as well as an after-dinner treat as they do on a dessert table. They're perfect for gifting, easy to transport, and always well received.
I've served them at gatherings, packed them into boxes for friends, and kept a stash in the fridge for quiet moments at home.
Their appeal is universal, and their simplicity is part of that charm.
Biscoff Truffles
Equipment
- Food processor or rolling pin for crushing biscuits
- Baking parchment
- Microwave-safe bowl or heatproof bowl
- Fork or dipping tool
Ingredients
- 200 Grams Biscoff biscuits
- 120 Grams Cream cheese
- 80 Grams Biscoff spread
- 150 Grams White chocolate
Instructions
- Crush the Biscoff biscuits into fine crumbs using a food processor or by placing them in a bag and crushing with a rolling pin.200 Grams Biscoff biscuits

- Transfer the crumbs to a mixing bowl, then add the cream cheese and Biscoff spread. Mix everything together until it forms a smooth, thick mixture.120 Grams Cream cheese, 80 Grams Biscoff spread
- Scoop out small portions of the mixture and roll them into bite-sized balls. Place them onto a lined baking tray.
- Transfer the tray to the freezer and chill for 1 hour, or until the truffles are firm.
- Meanwhile, melt the white chocolate in a microwave in short bursts, stirring between each, or over a bowl of simmering water until smooth.150 Grams White chocolate
- Remove the chilled truffle balls from the freezer. Using a fork or dipping tool, coat each one in the melted chocolate, allowing any excess to drip off before placing them back onto the tray.
- While the chocolate is still wet, sprinkle a few biscuit crumbs on top of each truffle for decoration.
- Place the truffles in the fridge and chill until the chocolate is fully set.

Notes
- Chill well before coating. This helps the truffles hold their shape when dipped in chocolate.
- Don’t overheat the chocolate. Melt gently to avoid it becoming thick or grainy.
- Use a fork for dipping. It makes coating easier and cleaner.
- Add variety. Try coating in milk or dark chocolate instead of white.
- Make them uniform. Use a small cookie scoop for evenly sized truffles.
- Storage. Keep in an airtight container in the fridge for up to 5 days.
- Freeze friendly. These truffles freeze well for up to 2 months.
Nutrition
If you're looking for a dessert that is simple, indulgent, and consistently impressive, Biscoff truffles are hard to beat. They bring together rich flavour, creamy texture, and a touch of elegance, all without ever turning on the oven.
Once you make them, they have a way of becoming a staple. And if you're ready to try more bite-sized treats, be sure to check out our cake balls recipe and vanilla shortbread truffles. Don't forget to follow us on social media for even more sweet inspiration, tips, and easy no-bake ideas straight from the kitchen.


