


Table of Contents
- Why I Love This Cheese and Chive Sourdough Loaf
- Tips for Better Rise and Texture
- Easy Variations
- Add Roasted Garlic
- Add a Little Heat
- Troubleshooting Sourdough Bread
- Pairing Suggestions
- Frequently Asked Questions
- How active should my sourdough starter be before making this loaf?
- Why is my sourdough dough sticky?
- How long does the dough need to rise?
- Can I refrigerate the dough overnight?
- Why do I need to let the loaf cool before slicing?
- What type of flour should I use for cheese and chive sourdough?
- How should I store cheese and chive sourdough bread?
- Can I freeze cheese and chive sourdough?
- Jump to Recipe
Why I Love This Cheese and Chive Sourdough Loaf
This cheese and chive sourdough loaf is the kind of bread I make when I want something rustic, savory, and a little more special than a plain loaf. The dough begins with active sourdough starter, water, salt, and all-purpose flour, then grated medium cheddar and fresh chives are folded through before shaping.

Once baked, the loaf has a crisp, golden crust, a pleasantly chewy crumb, and pockets of melted cheese throughout. I especially love the mild onion flavor from the fresh chives and the savory aroma that fills the kitchen as the bread bakes.

Tips for Better Rise and Texture
The most important starting point is an active starter. Feed your sourdough starter 4-12 hours before mixing the dough. It should look bubbly and active before you begin, because that gives the loaf the best chance to rise well.
The dough should feel slightly sticky after mixing. Avoid adding too much extra flour at this stage. A sticky dough is normal here, and too much flour can make the finished loaf dense.
The stretch-and-fold rounds help build structure without heavy kneading. Grab one edge of the dough, stretch it upward, then fold it back toward the center. Rotate the bowl and repeat until one round is complete. Spacing the rounds 30 minutes to 1 hour apart gives the dough time to relax between folds.
During bulk fermentation, look for visual cues rather than only watching the clock. The dough should double in size and look bubbly on the surface. This can take 4-12 hours, depending on room temperature.
After shaping, let the dough rise in a floured banneton basket or towel-lined bowl. For the best slicing texture, cool the finished loaf for at least 1 hour before cutting into it.

Easy Variations
Add Roasted Garlic
Fold a few cloves of roasted garlic into the dough along with the cheddar and chives. It adds a soft, savory flavor that works beautifully with the cheese without overpowering the loaf.
Add a Little Heat
Mix in a small amount of finely chopped jalapeño or a pinch of red pepper flakes with the cheese and chives. This gives the bread a gentle kick and makes it especially good for serving with soups, stews, or savory lunches.

Troubleshooting Sourdough Bread
If the dough is not rising well, check that your starter was bubbly and active before mixing. If your starter has been sitting for a while, my guide on How to Revive Old Sourdough Starter can help you get it active again before baking.
If the loaf turns out dense, the dough may have needed more fermentation time, or too much flour may have been added. Sticky dough is normal, so avoid over-flouring the work surface. For a better understanding of the process, read my Sourdough Basics article before starting.
If you are new to sourdough or need to make a starter from scratch, my Sourdough Starter Recipe is a helpful place to begin. Always let the finished loaf cool for at least 1 hour before slicing so the texture can set properly.

Pairing Suggestions
Serve this loaf once it has cooled and sliced cleanly. The cheddar and chives make it a savory bread that works well with simple meals. It is especially good when you want a homemade loaf with more flavor than plain sourdough. Serve it alongside soups, stews, salads, as part of a charcuterie board, or even a casual lunch where the bread can be the main feature.

Cheese and Chive Sourdough Loaf
Equipment
- Kitchen scale or measuring cups
- Banneton basket or bowl lined with a towel
- Bench scraper or sharp knife
- Plastic wrap or clean kitchen towel
Ingredients
- ½ cup sourdough starter
- 1 ⅓ cups water
- 4 ¾ cups all-purpose flour
- 1 tablespoon fine salt
- 1 ¼ cups medium cheddar cheese grated
- ¾ cup fresh chives finely chopped
- extra grated cheese for topping, optional
Instructions
Prepare the Starter
- Feed your sourdough starter 4-12 hours before starting the recipe, until active and bubbly.½ cup sourdough starter
Make the Dough
- In a large mixing bowl, combine the sourdough starter, water, and salt. Stir together with a spatula.1 ⅓ cups water, 1 tablespoon fine salt
- Add the flour and mix until a rough, shaggy dough forms. Finish mixing with your hands until all the flour is incorporated. The dough should feel slightly sticky.4 ¾ cups all-purpose flour
- Cover the bowl with plastic wrap or a damp kitchen towel and let the dough rest for 30–40 minutes.
Stretch and Fold
- Grab one edge of the dough, stretch it upward, then fold it back toward the center. Rotate the bowl and repeat several times to complete one round.
- Repeat this process 2 more times, spacing each round 30 minutes to 1 hour apart.
Bulk Fermentation
- Cover the dough and leave it in a warm place to rise until doubled in size and bubbly on the surface. This can take anywhere from 4–12 hours depending on room temperature.
Shape the Dough
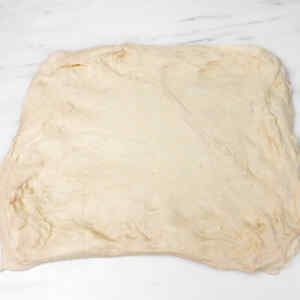
- Turn the dough onto a lightly floured surface and gently shape it into a rectangle.

- Sprinkle the grated cheddar cheese and chopped chives evenly over the dough.1 ¼ cups medium cheddar cheese, ¾ cup fresh chives
- Fold one side of the dough into the center, then fold the other side over the top. Roll the dough tightly from one end, like a cinnamon roll.
- Tuck the ends underneath and shape into a round loaf.

Final Rise
- Place the dough seam-side up into a floured banneton basket or towel-lined bowl. Cover and let rise for 1-2 hours, or refrigerate overnight.
Bake the Bread
- Set the oven to 480°F (250°C)
- Place the dough onto a sheet of parchment paper and lightly flour the top. Score the dough with a sharp knife or bread lame.
- Transfer the dough and parchment paper into a cold Dutch oven. Cover with the lid and place it in the preheated oven.
- Bake for 40 minutes.
- Reduce the oven temperature to 400°F (200°C). Remove the lid, sprinkle extra cheese on top if using, and bake uncovered for another 15 minutes until golden brown.extra grated cheese


Cool and Serve
- Transfer the loaf to a wire rack and let it cool for at least 1 hour before slicing.

Notes
- Active starter matters: Your starter should be bubbly and active before mixing the dough for the best rise.
- Be patient with fermentation: Rising times can vary depending on the warmth of your kitchen.
- Sticky dough is normal: Avoid adding too much extra flour or the loaf may become dense.
- Cold Dutch oven method: Place the shaped dough in a cold Dutch oven, cover it with the lid, then transfer the pot to the fully preheated oven.
- Cool before slicing: Letting the loaf cool fully helps the texture set properly inside.
- Extra cheesy top: Adding cheese during the final bake creates a crisp, golden crust.
Nutrition
Frequently Asked Questions
How active should my sourdough starter be before making this loaf?
Use your sourdough starter when it is at or close to its peak activity. It should have at least doubled after feeding, contain plenty of bubbles, and have a slightly domed surface. Depending on your room temperature and feeding ratio, this may take anywhere from 4 to 12 hours, so rely on the appearance of the starter rather than the clock alone.
Why is my sourdough dough sticky?
A slightly sticky or tacky dough is normal for this recipe, especially when using all-purpose flour. Use damp hands when handling and folding it rather than adding a large amount of extra flour. The dough should become smoother and easier to handle as the gluten develops. Adding too much flour can produce a dry, dense loaf.
How long does the dough need to rise?
Bulk fermentation usually takes between 4 and 12 hours, depending on the strength of your starter and the temperature of your kitchen. Rather than waiting for the dough to double completely, look for a noticeable increase in volume, a puffier texture, bubbles around the sides and surface, and a slight wobble when the bowl is moved. The dough should feel aerated but still have enough strength to hold its shape.
Can I refrigerate the dough overnight?
Yes. After shaping, place the dough seam-side up in a well-floured banneton or a towel-lined bowl. Cover it well so the surface does not dry out, then refrigerate it overnight. The cold proof develops flavor, makes the dough easier to score, and allows you to bake the loaf the following day.
Why do I need to let the loaf cool before slicing?
Let the loaf cool on a wire rack for at least 1 hour before slicing. The crumb continues to set as the bread cools, and cutting it too soon can make the inside seem gummy or compressed. Cooling also allows the loaf to slice more cleanly and helps the cheese settle into the crumb.
What type of flour should I use for cheese and chive sourdough?
This recipe was tested with all-purpose flour, which produces a tender, pleasantly chewy crumb. Bread flour may also work, but its higher protein content can make the dough slightly stronger and the finished loaf a little chewier. You may also need to adjust the water slightly because different flours absorb moisture differently.
How should I store cheese and chive sourdough bread?
Let the loaf cool completely before storing it. Keep it in a bread bag, airtight container, or well wrapped at room temperature for up to 2 days. Avoid refrigerating it if possible, as the cold temperature can make the bread dry and stale more quickly. Freeze it for longer storage.
Can I freeze cheese and chive sourdough?
Yes. Let the loaf cool completely, then freeze it whole or cut it into slices. Place it in a freezer-safe bag or wrap it tightly to prevent freezer burn. For the best texture and flavor, use it within 2 to 3 months. Individual slices can be toasted directly from frozen.


